
Setup Service Level Agreements (SLAs) in Dynamics 365 Customer Service
Here is a Step-by-Step Guide to Set Up an SLA in Dynamics 365 (D365) Customer Service in the Copilot Service Admin Center


This post walks through how to configure a Service Level Agreement (SLA) in Microsoft Dynamics 365 Customer Service using the Copilot Service Admin Center. SLAs help track key performance indicators (KPIs) like First Response Time or Case Resolution Time to ensure timely customer support.
Prerequisites
- Permissions: Ensure you have the System Administrator or System Customizer security role in your D365 Customer Service environment
- Environment: Access to the Copilot Service admin center in your D365 Customer Service environment
- Entity: The entity (i.e. Case) must be SLA-enabled. For non-Case entities, enable SLAs via the Power Apps Maker Portal (Advanced Settings > Solutions > {{ Your Solution }} > Entities > {{ Entity }} > Enable for SLA)
- Business Hours: Optionally, set up Customer Service schedules or holiday calendars to define work hours. Navigate to Operations > Customer Service Calendars to create these
Access the Copilot Service Admin Center
Sign in to your Dynamics 365 Customer Service environment
Navigate to the Copilot Service Admin Center model-driven app
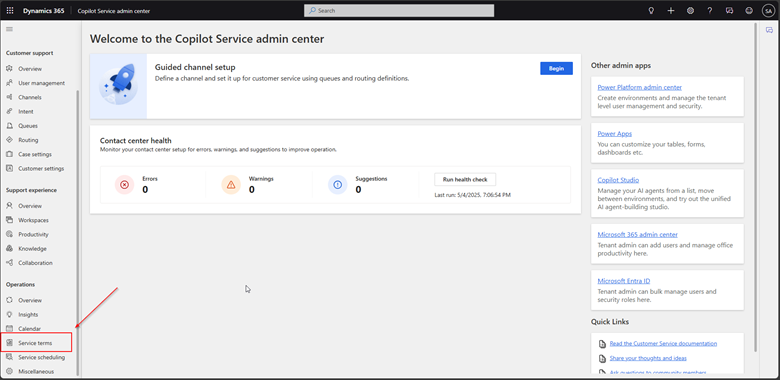
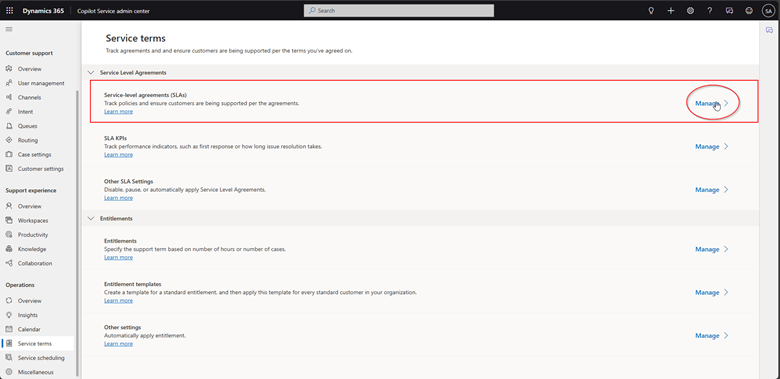
In the site map, under Operations, select Service terms. The Service terms page appears
Create SLA KPIs
SLA KPIs define performance metrics, such as First Response or Resolve By, to track in the SLA
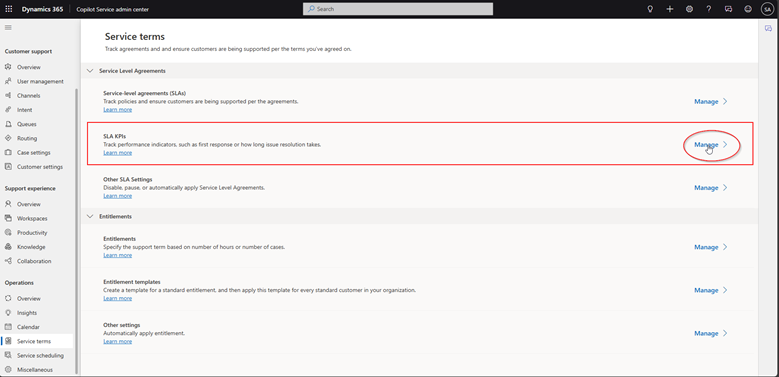
On the Service terms page, in the SLA KPIs section, select Manage. The Active SLA KPIs view is displayed
Click the +New button to create a new SLA KPI
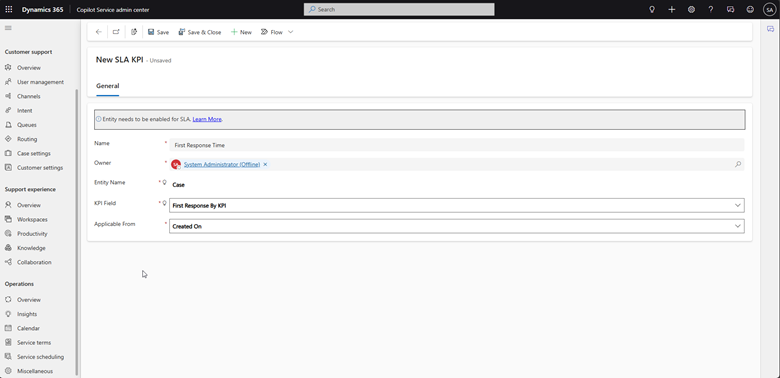
The New SLA KPI form opens
Fill in the following fields:
- Name: Enter a descriptive name (i.e. "First Response Time")
- Owner: Defaults to the user creating the KPI. Change if needed
- Entity Name: Select the entity (i.e. Case)
- KPI Field: Choose the relevant KPI field (i.e. FirstResponseByKPI for first response time or ResolveByKPI for resolution time)
- Applicable From: Select the field that triggers the KPI timer (i.e. Created On for when the case is created)
Click the Save & Close button
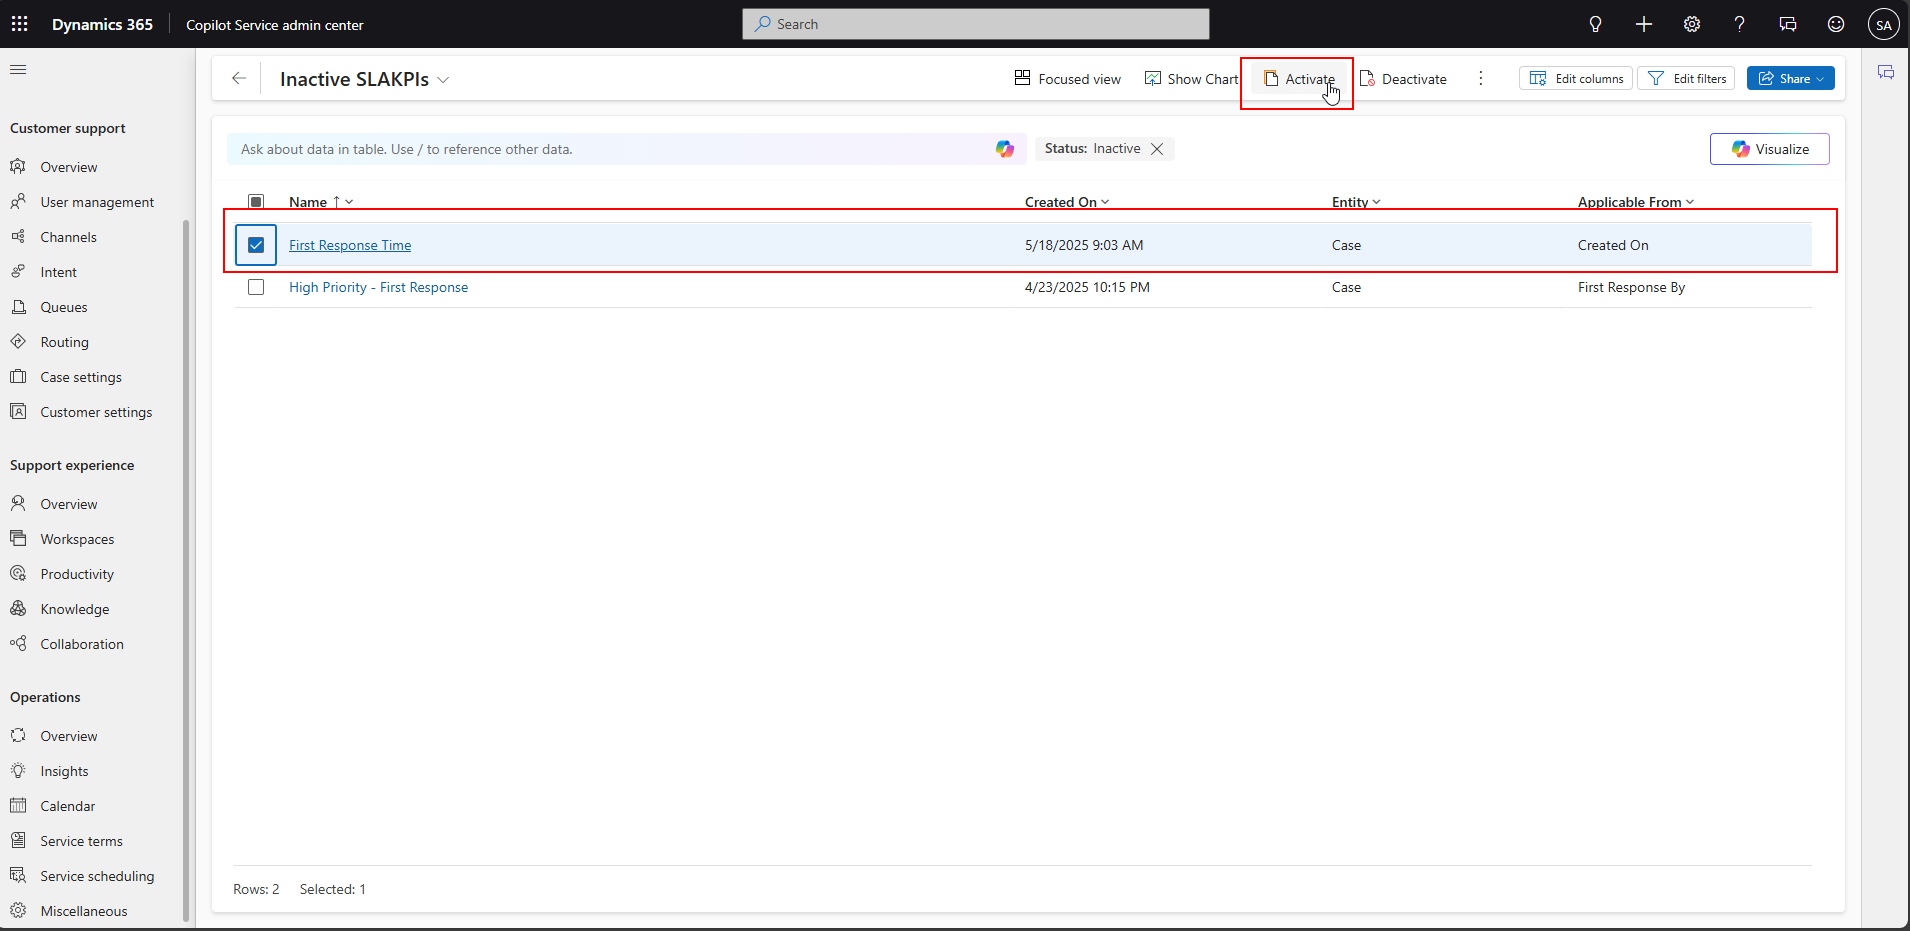
Be sure to Activate your new SLA KPI by selecting the row and clicking the Activate button in the ribbon
Create a New SLA
On the Service terms page, in the Service Level Agreements (SLAs) section, select Manage
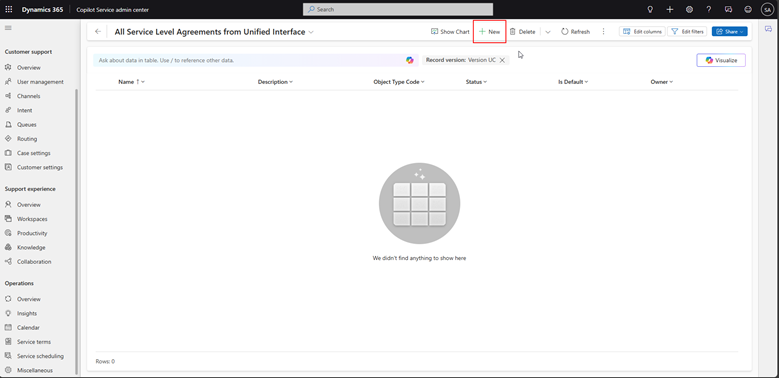
The All Service Level Agreements view is displayed
Click the +New button
The New SLA page appears
Enter the following details:
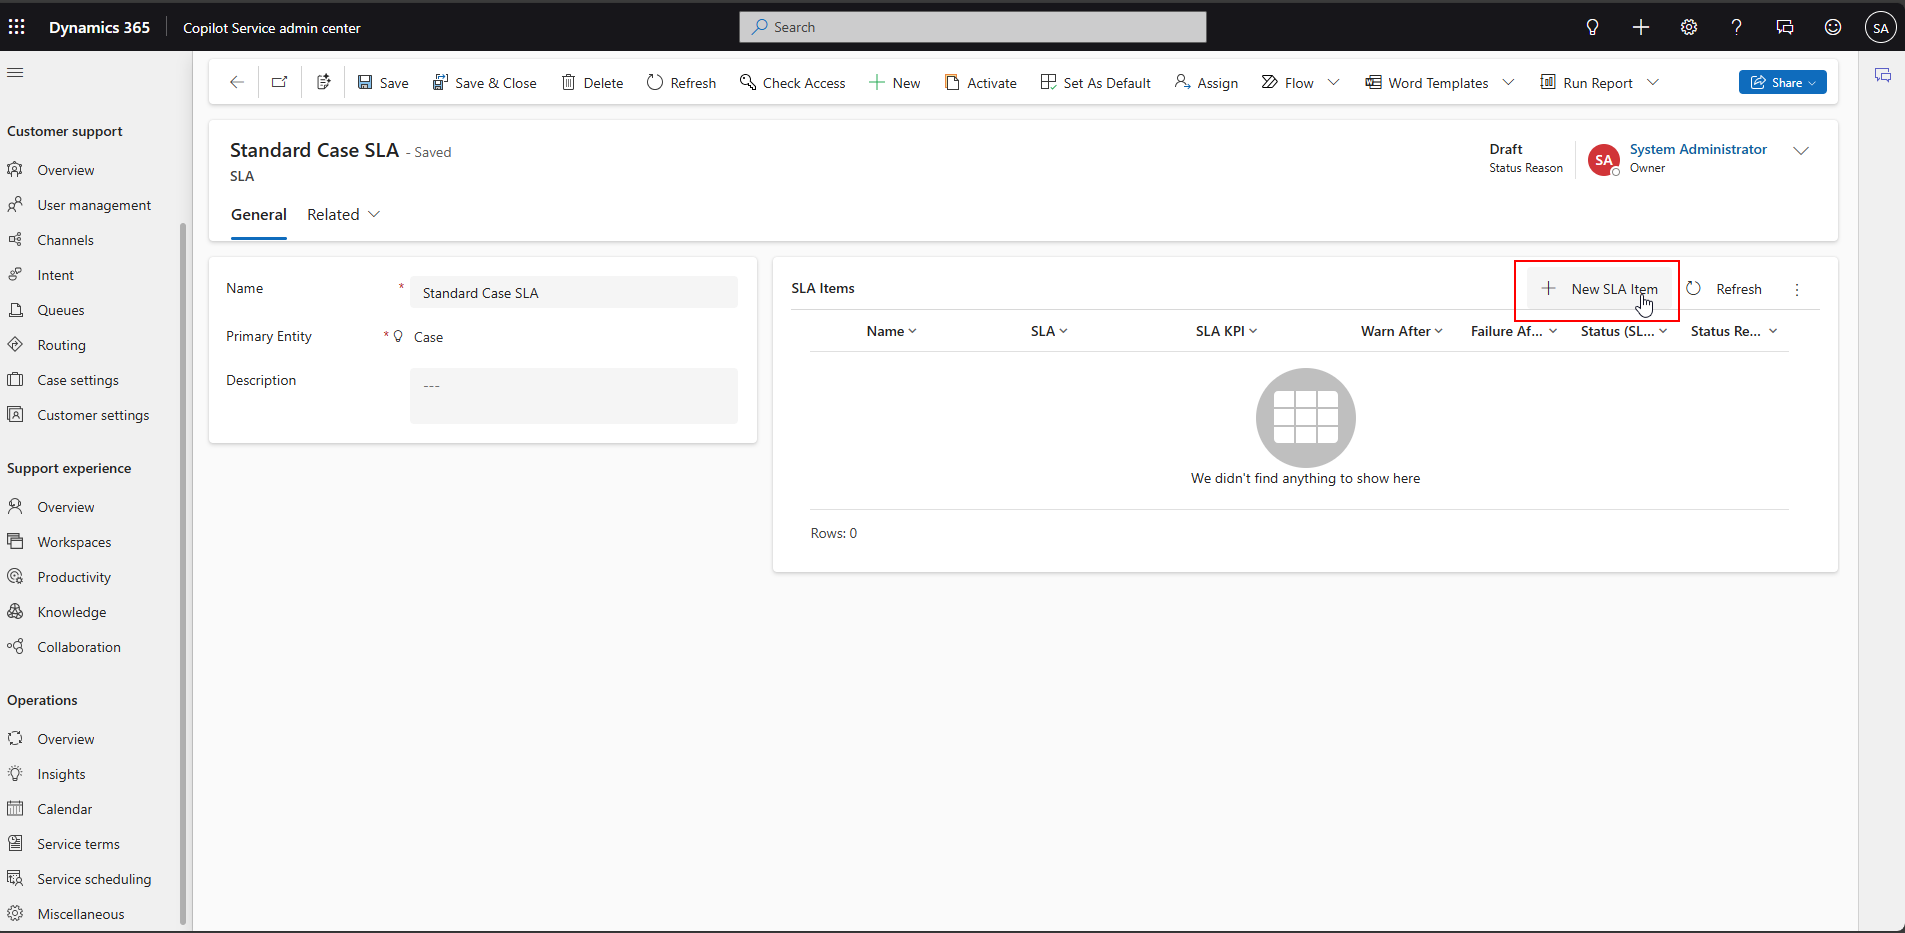
- Name: Provide a unique name for the SLA (i.e. "Standard Case SLA")
- Primary Entity: Select the entity (i.e. Case)
- Description: (Optional) Add a description for clarity
Click the Save button
The SLA Items section becomes available and the SLA is saved.

Add SLA Items
SLA items define the conditions, timers, and actions for each KPI
In the SLA Items section of the SLA page, click the +New SLA Item button
The New SLA Item form opens
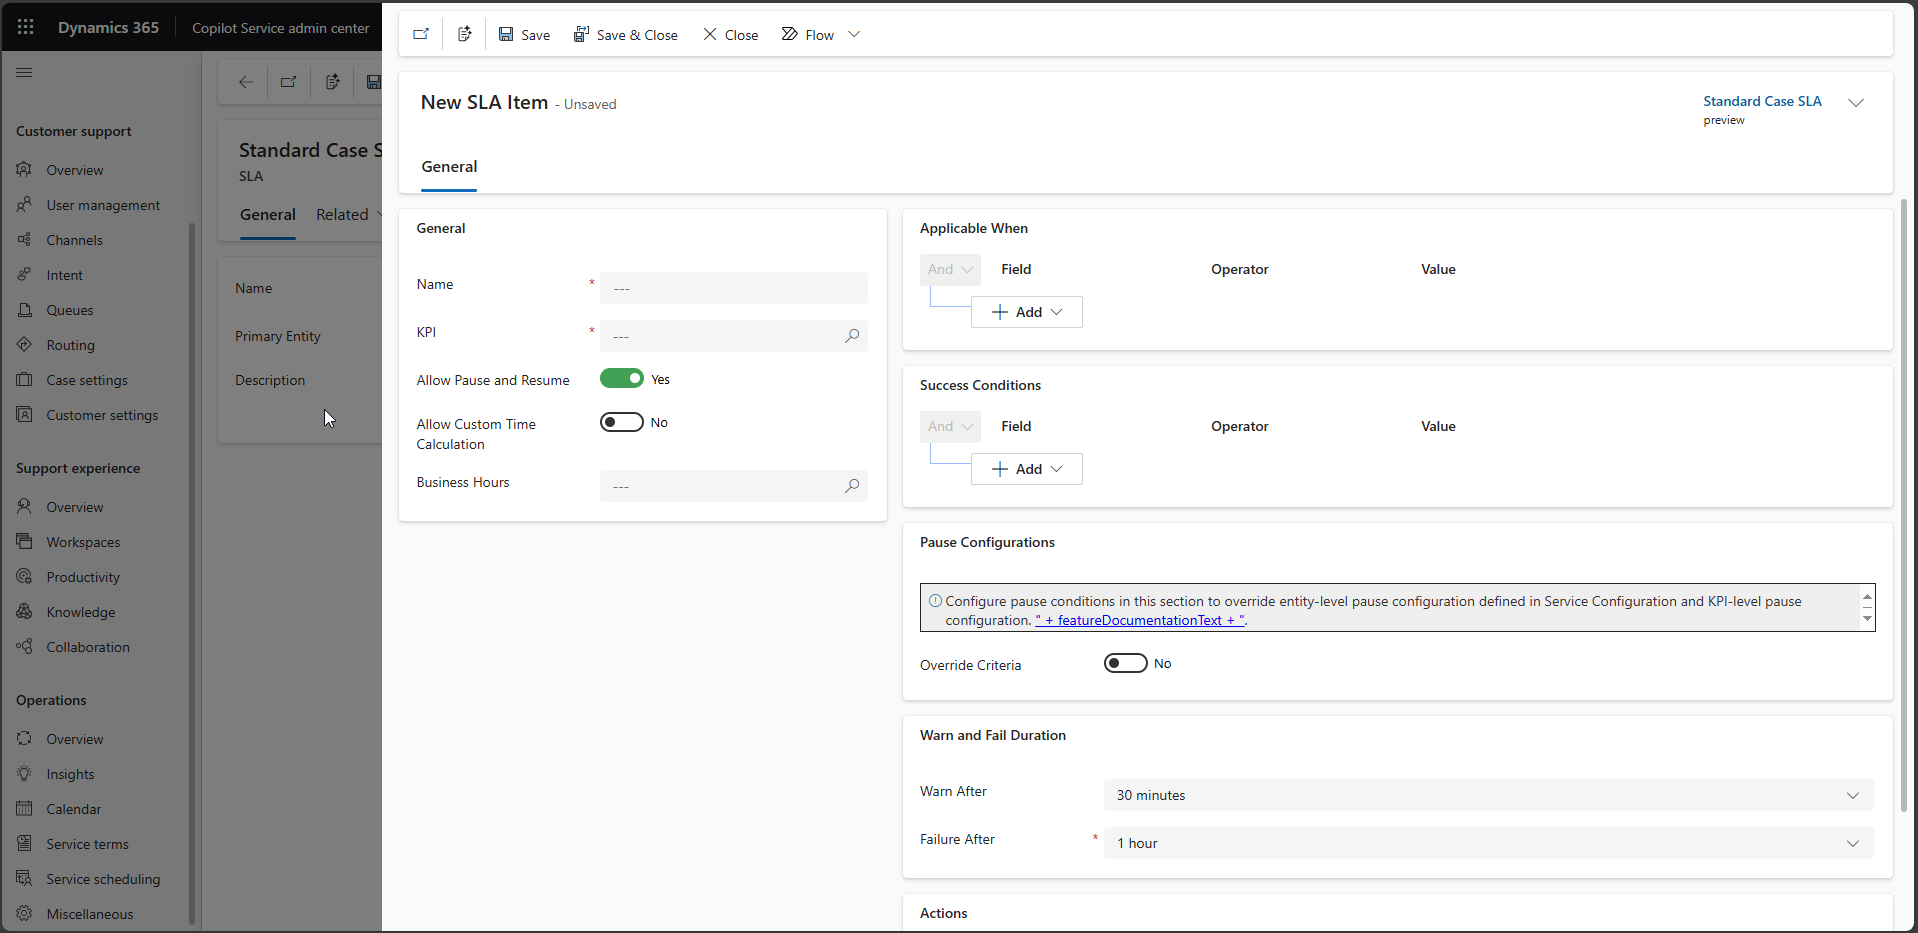
Configure the SLA item:
- Name: Enter a name (i.e. "First Response SLA Item")
- KPI: Select the SLA KPI created in Step 2 (i.e. First Response Time)
- Business Hours: (Optional) Select a customer service schedule to calculate SLA time based on work hours
- If blank, it assumes 24/7 availability
- Allow Pause and Resume: (Optional) Enable this to pause the SLA timer when the case is on hold
- Define "on hold" statuses in Service Configuration Settings (Service Terms > Other SLA Settings > Manage)
- Applicable When: Define conditions for when this SLA item applies (i.e. "Priority equals High")
- Use the condition builder to set criteria
- Success Criteria: Specify the condition for SLA success (i.e. "First Response Sent equals Yes")
- Warning Time: Set the time (in minutes, hours, or days) before a warning is triggered (i.e. 30 minutes for first response)
- Failure Time: Set the time before the SLA is marked as failed (i.e. 1 hour for first response)
Click the Save button, Repeat for any additional SLA items (i.e. one for resolution time).
Configure SLA Actions (Optional)
You can set up actions (i.e. notifications) for SLA warnings, failures, or successes using Power Automate
In the SLA Items section, select an SLA item and click Configure Actions
The Power Automate designer should open in a new tab
Add actions like sending an email to the case owner or escalating to a manager when the KPI Instance becomes non-compliant
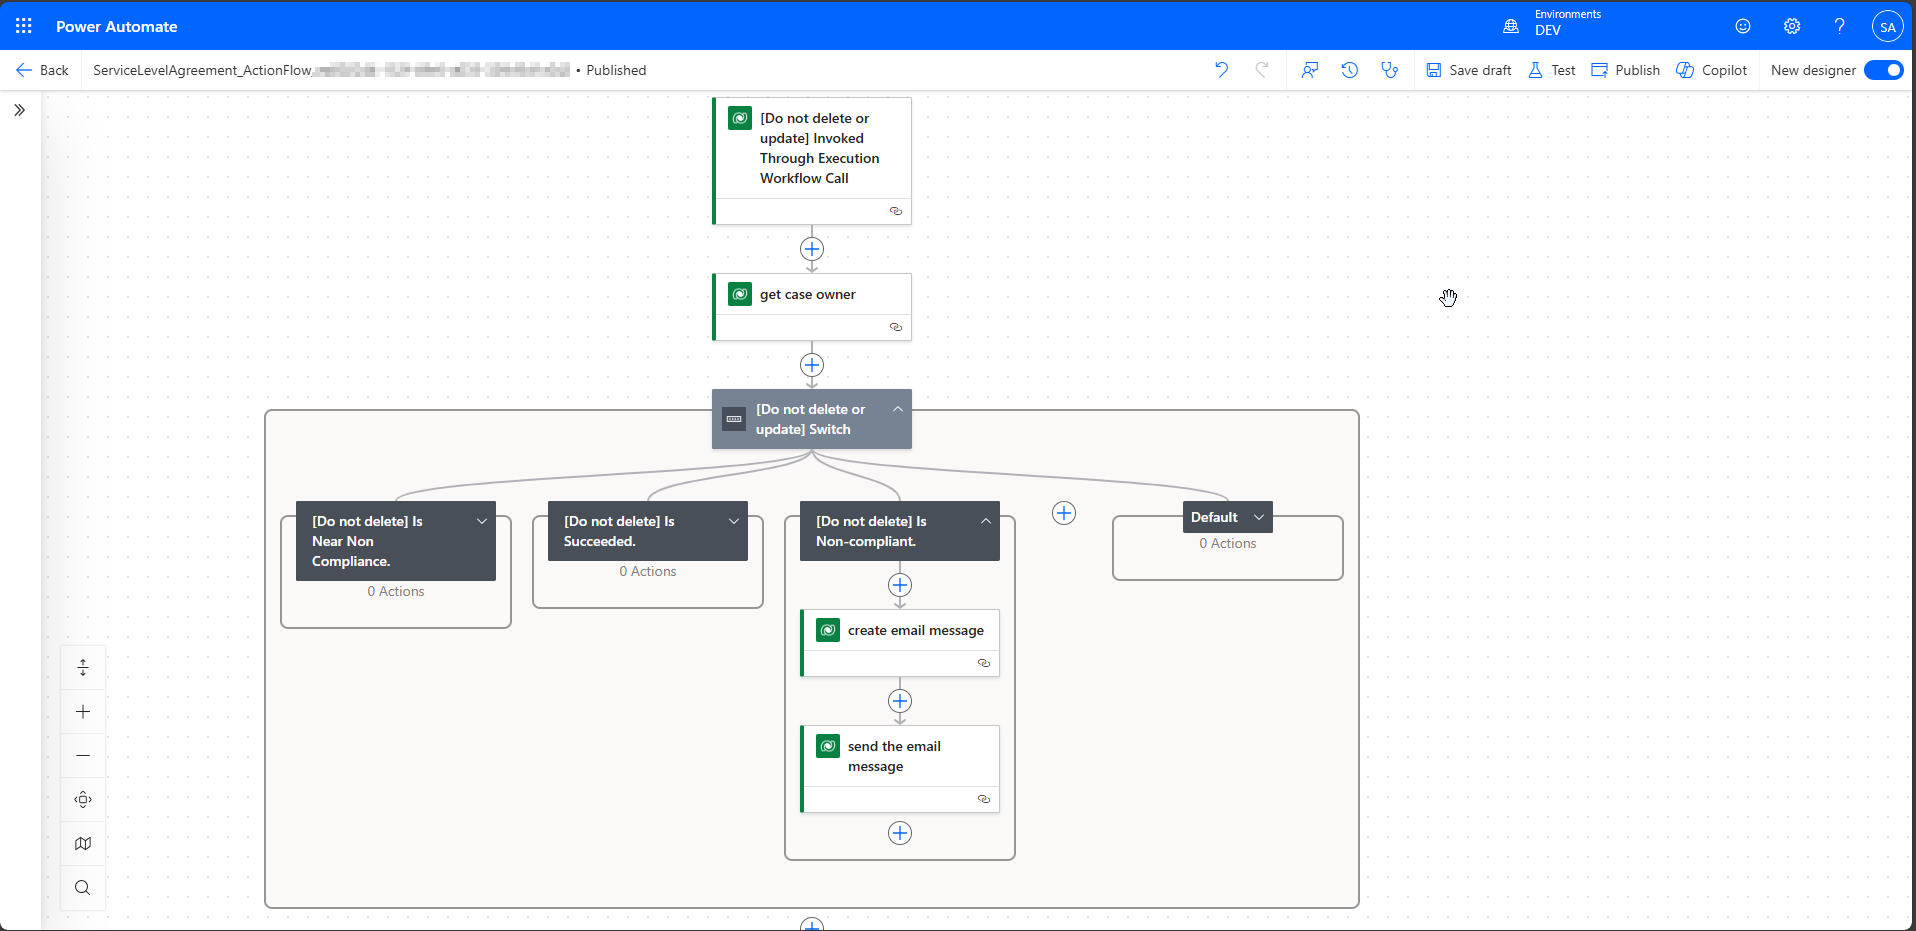
Publish your flow and close the tab
Click the Save & Close button to close the SLA Item form
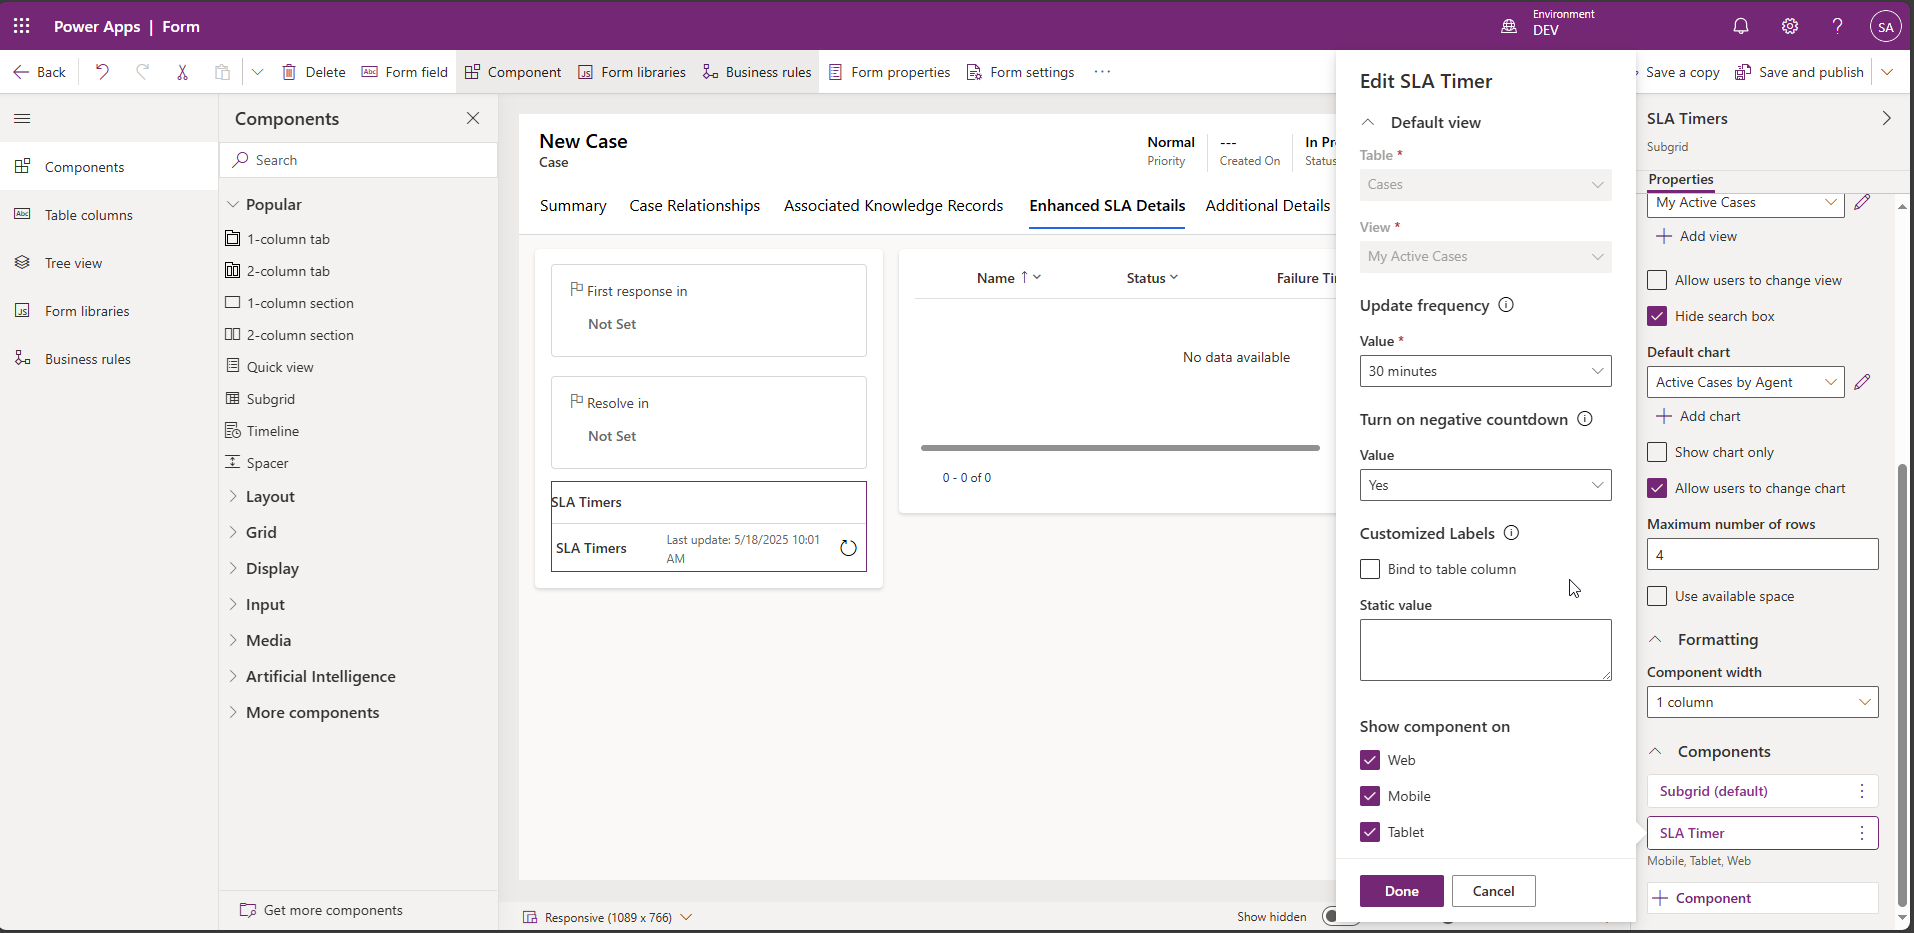
Add an SLA Timer to the Case Form
To display SLA timers on the Case form for visibility:
- Go to Power Apps (make.powerapps.com) and select your environment
- Navigate to your solution and add the Case main form - {{ Your Solution }} > Forms > Case > {{ Your Case Main form }}
- Open the Case form in the form editor
- Add a sub-grid to display the SLA timer, the related table can be SLA KPI Instances (Regarding):
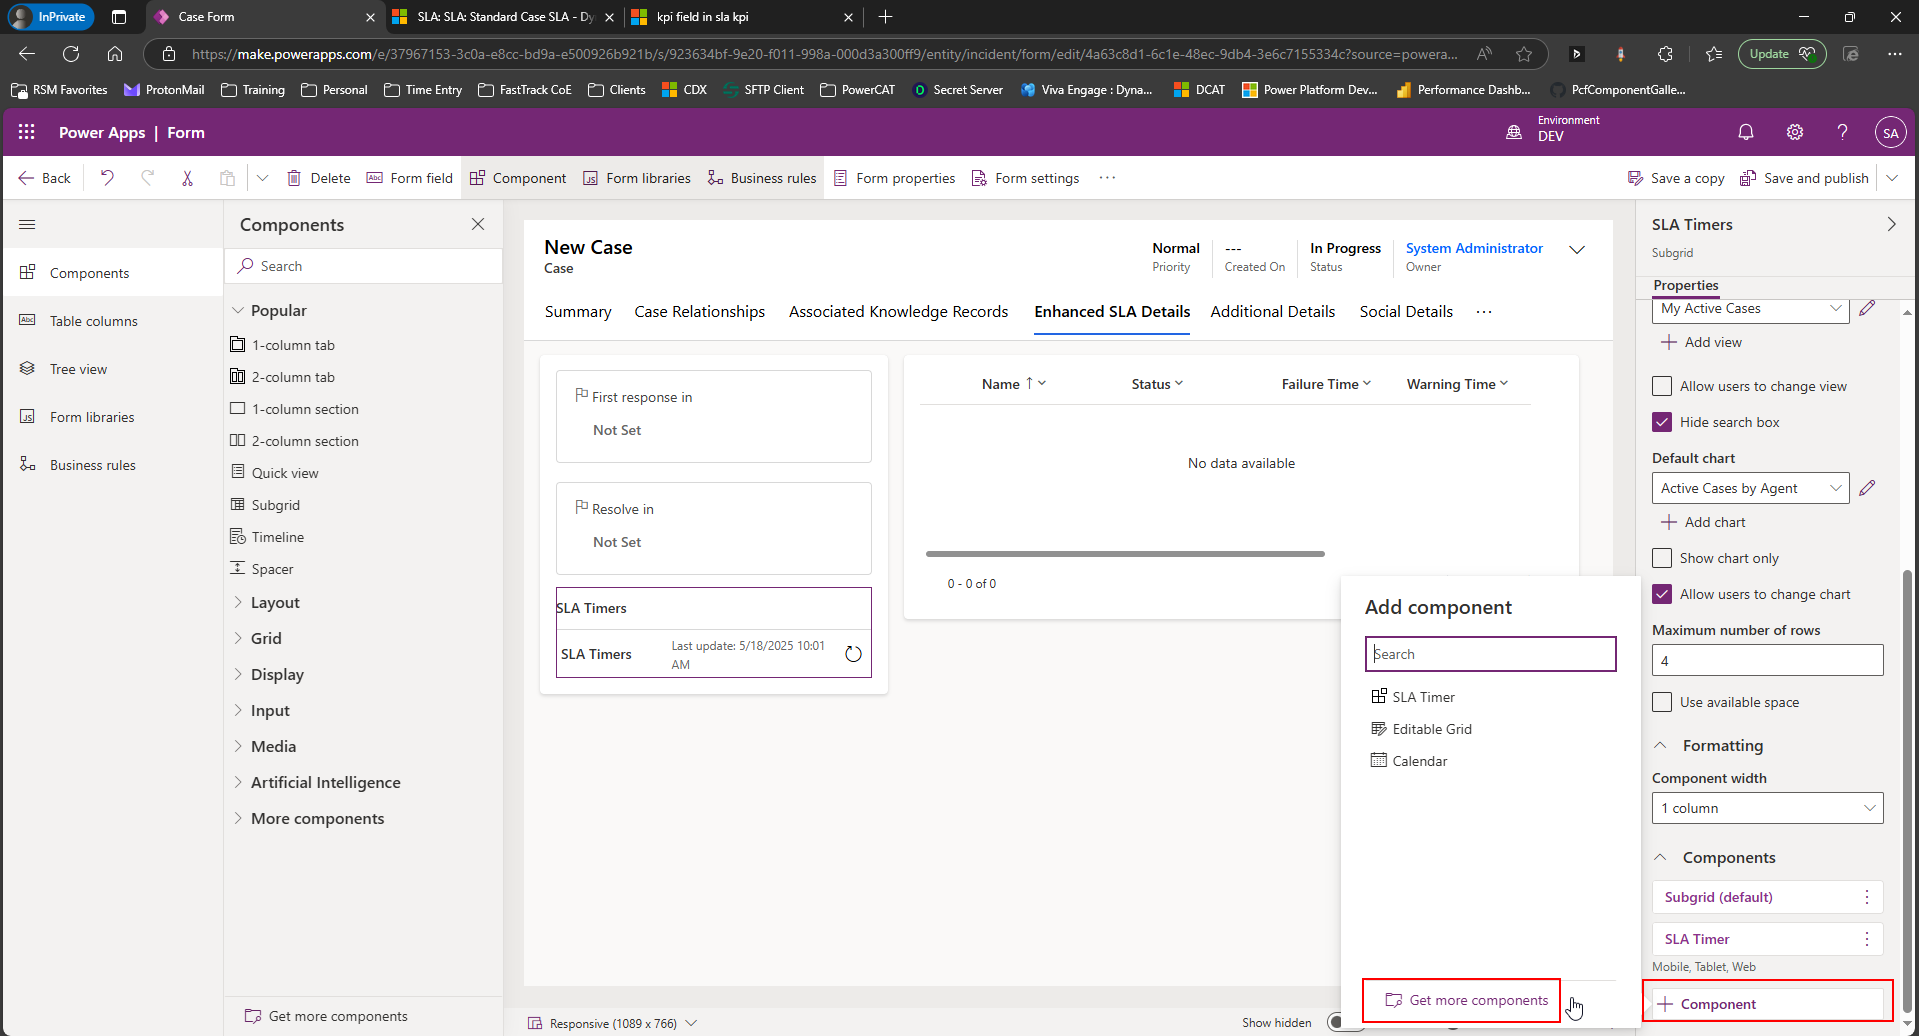
- In the Components tab, click +Component and select SLA Timer
- Configure the control (i.e. set update frequency)
If the SLA Timer component is not available, click the Get More Components link
Search for SLA Timer, select the control and click Add
Ensure the SLA field (in this instance - First Response Sent) is on the form
Save and Publish the form
Activate the SLA
Return to the SLA in the Copilot Service admin center (Service terms > SLAs > Manage)
Select the SLA and click Activate. Only activated SLAs are applied to records
(Optional) Set the SLA as the default by clicking Set As Default. Only one SLA can be the default per entity

You will see the Status change from Draft to Active
Test the SLA
Create a new Case record that meets the Applicable When conditions of the SLA
Verify that:
- The SLA is applied (check the SLA field on the Case form)
- The timer appears and updates based on the configured warning and failure times
- Actions (i.e. notifications) trigger as expected
Test pause/resume functionality (if enabled) by changing the case status to an "on hold" status
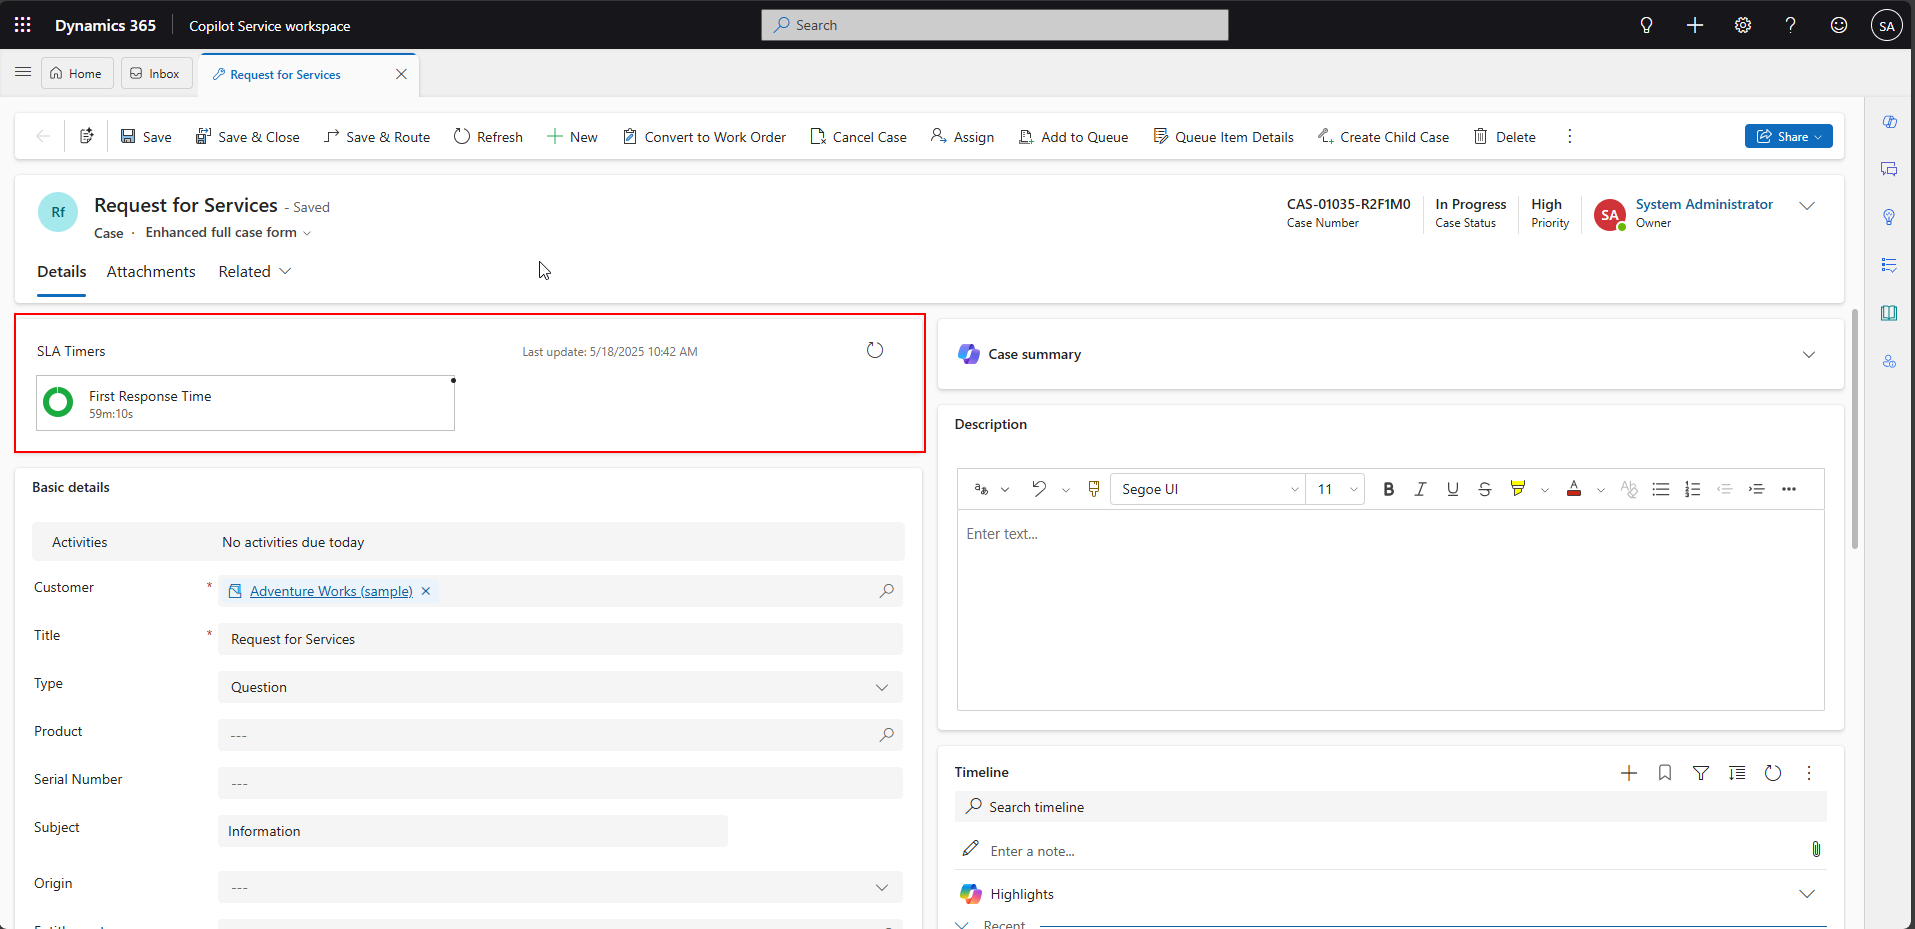
Once the First Response Sent is set to Yes, the SLA is satisfied and the SLA Timer now shows as Succeeded

Monitor
Monitor SLA Performance: Use views in Copilot Service Workspace or create custom reports to track SLA compliance
Additional Notes
Limits
- You can have up to 7 active SLA-enabled entities
- It is recommended to have a maximum of 5 KPIs per entity
- 100 SLA items per SLA entity but Microsoft recommends < 15
Enhanced SLAs
For non-Case entities, enable SLAs and create a custom lookup field to the SLA KPI Instance entity if needed
Troubleshooting
SLA Not Applied: Check if the SLA is activated, the entity is SLA-enabled, and the Applicable When conditions are met
Timer Not Visible: Ensure the SLA Timer control and SLA field are on the form and published
Action Not Triggering: Verify the Power Automate flow is active and correctly linked
For further details, refer to Microsoft Learn: Configure service-level agreements in Dynamics 365 Customer Service.